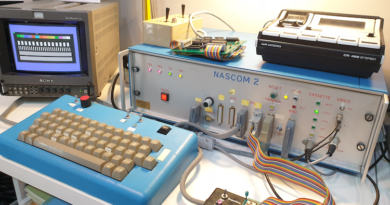
Z80 SBC using Tom Szolyga’s SBC-Z80 Board
Introduction
This article forms a short review of the ‘homebrew’ Grant Searle designed Z80 CP/M machine, built using Tom Szolyga’s Z80SBC printed circuit board.
The computer is a single board Z80 CP/M enabled computer that uses a CF Card to provide disk storage. The basic machine simply requires a VT100 type terminal to be connected to one of the device’s headers via either an FTDI type cable or a TTL to RS232 converter.
Full details of Grant’s design can be found here http://www.searle.wales (https://searle.x10host.com/cpm/index.html) and details of Tom’s CP/M Z80 Board and the schematic, can be found on the EasyEDA website (https://easyeda.com/peabody1929/CPM_Z80_Board_REV_B_copy-76313012f79945d3b8b9d3047368abf7).
Some additional information and ideas for troubleshooting can be found on the RC2014-Z80 Google group (https://groups.google.com/forum/m/#!forum/rc2014-z80).
Construction
The PCB is of a very high quality and the components were easy to source, the whole thing can be built in under an hour. In my case everything except the CPU, SIO-2, On/Off Switch and CF Card components were obtained from Reichelt Elektronik (https://www.reichelt.com/gb/en/?r=1). The CPU and SIO-2 were sourced from the LittleDiode Components Ebay shop (https://www.ebay.co.uk/str/littlediode), Ebay was also used to source the CF Card-IDE adapter and the CF Card itself.
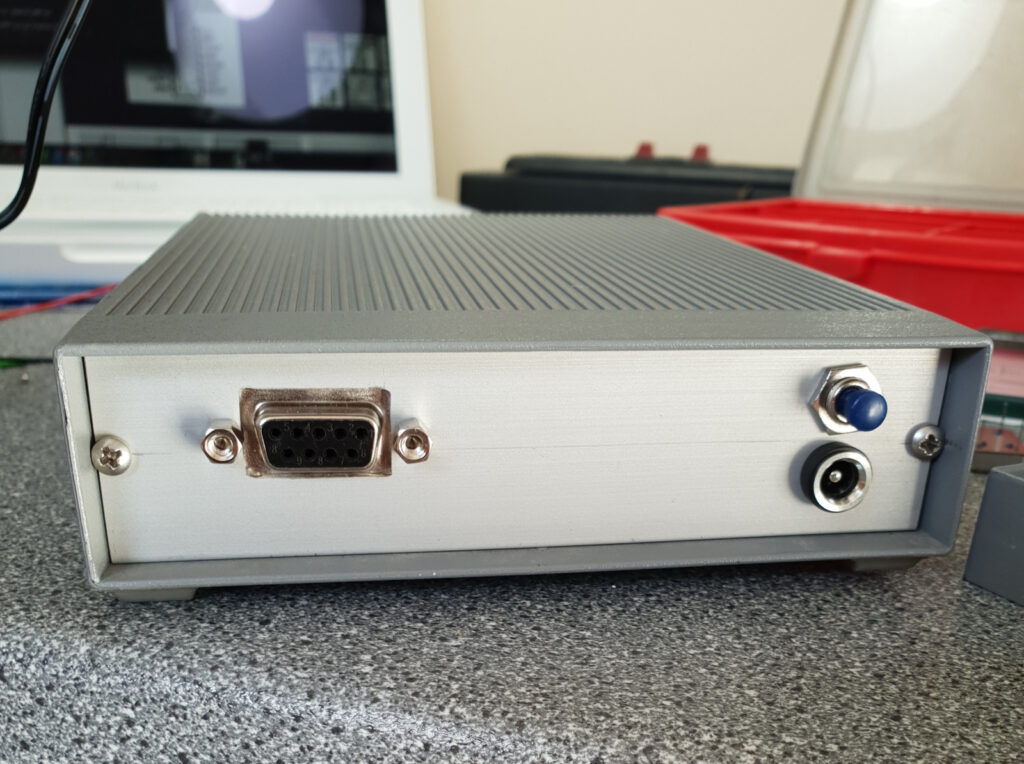
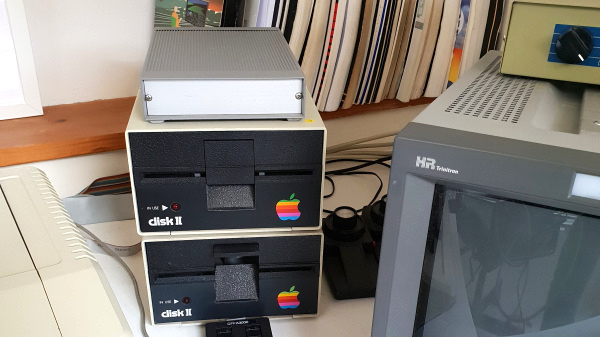
I used a case from an old Packet Radio TNC, the front and rear panels were cut from some anodised aluminium bar purchased from B&Q (UK) and the PCB was mounted to a slightly larger sheet in order that it would slide in neatly.
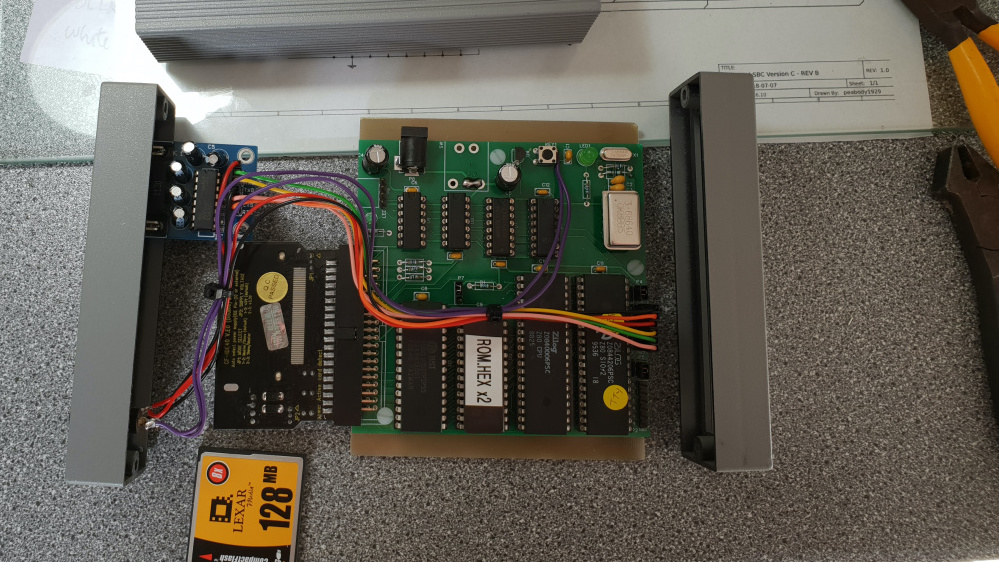
Tom’s PCB requires a 27256 EPROM, however, as I don’t have access to an EPROM programmer, I tested the device with a 27128 EPROM that had been programmed for Grant’s original design. This was fudge but allowed the device to be tested with the Monitor (see Appendix A – Testing with a 27128 EPROM). Once I was happy that I had a working machine I sent Grant’s ROM.HEX file (http://www.searle.wales and https://searle.x10host.com/cpm/index.html) to Mark Haysman (http://www.retroclinic.com/), and a suitably programmed device arrived the next day.
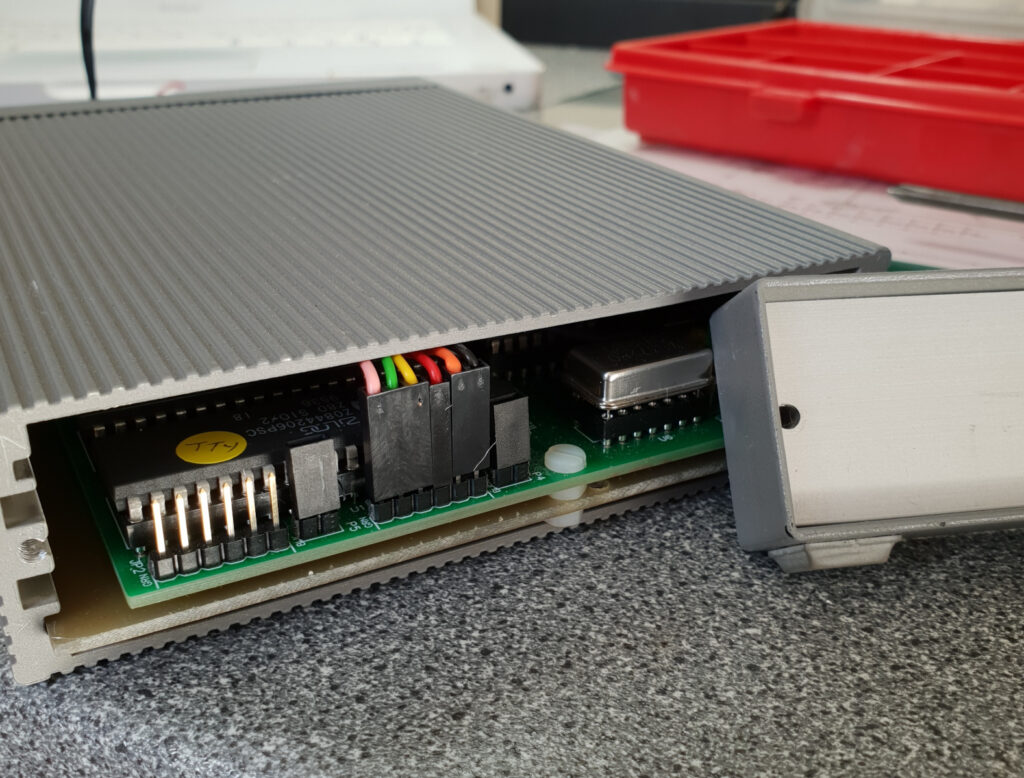
For my board I used a 6Mhz Z80/SIO NMOS setup overclocked at 7.3728 MHz, I did experience the odd system hang every now and then and after a little investigation, noticed that the clock output (Pin 8 of U6) showed a small spike at the begining of the clock cycle on my osciloscope, whilst this could easily have been due to some bad probing on my part, I decided to investigate further. The solution was remarkably easy, I simply removed U6 (74HCT00) and repalced it with a standard 14 DIL can oscillator. The design of the board makes this an option as the clock output from the 74HCT00 is the same pin (PIN 8) as the output from the can oscilator. I purchased two oscilators from LittleDiode, one was a 7.3728 MHz device (QX14T50B7.372800B50TT), the other was a 3.6864 MHz device (QX14T50B3.686400B50TT). This allowed me to experiment with the clock speed. I am happy to report that by using the 7.3728 Mhz oscillator, no further issues were observed. The slower oscilator gives a more retro feel so I was initially torn as to which one to stick with until I compiled a simple hello world program using the HiTec C Compiler, the machine now runs at 7.3728 Mhz.
The PCB provides two headers suitable to attach serial ports. During testing I used an FTDI lead on both port 1 (CRT)) and port 2 (TTY). Either port can be used to attach the terminal, the monitor will detect a press of the spacebar and configures CP/M accordingly (see Grants website for the full details of how IOBYTE gets configured). The baud rate shoud be set to 57600 Baud when using the 3.6864 MHz clock and 115200 when using the 7.3728 MHz clock. In the final build (see photos) I used a a RS232-TTL converter mounted directly to the case to give me the more traditional serial port.
Powering the Device
There are two options to power the device, a small link on the board allows the board to be powered from an FTDI lead/adapter. Otherwise a separate 5V power supply can be used. It is important to ensure that when the link is set to power from the USB/FTDI lead that a PSU is not also used.
Powering via USB is very convienient and makes the board very portable, however, when powered this way using my MacBook Air, I noticed that the Z80SBC machine occaisionally reset. The device draws upwards of 250mA and the FTDI cable I used was very thin which caused a small voltage drop, I suspect that this was the issue. In the final build (see photos) I used a seperate PSU and the machine has been running continuosly for over a week now with no such issue.
Configuration
The completed machine can be booted via the monitor to Microsoft Basic which is held in EPROM. I particularly wanted a CP/M machine using the CF card as disk drives, to achieve this some additional configuration was required.
Grant’s website (http://www.searle.wales and https://searle.x10host.com/cpm/index.html) includes all of the details and files required to configure the device for CP/M. The basic process is to paste programs (in Intel HEX format) into the terminal window, these are stored in memory by the onboard monitor and can be executed as required. This process is used to format the CF card and to place the CP/M system on disk A:.
Once CP/M is running, applications can be installed by pasting specially formatted text based package files into the terminal. Grant provides a subset of the CP/M utilities as a package file and a simple to use Windows program to create these packages (see Application Package Files below).
The configuration process works reasonably well, however, I did notice that when pasting the Intel HEX files and package files, the system often reported checksum errors. Investigation showed that this was due to the paste operation overflowing the command line of the system. This was solved by setting a Character Transmit Delay. For example, Minicom can be configured by selecting the Meta Z (typically Esc+Z) to bring up the main menu, from here the Terminal Settings option allows the Character tx delay (ms) setting to be changed. I found that the optimal setting was 1-2ms for a machine with the 7.3728 MHz clock and 3-4 ms for the 3.6864 MHz clock. I also found it more reliable to paste the files individually rather than all at once.
Application Package Files
Grant Searle’s website (http://www.searle.wales and https://searle.x10host.com/cpm/index.html) includes a simple to use Windows program to create package files. The program will run happily under Wine on Linux or MacOS. The CP/M configuration process described by Grant (see above) includes deploying a file called DOWNLOAD.COM to drive A: of the CP/M machine. It is this program that enables the package files to be pasted into the console and turned into CP/M files.
If for any reason Grant’s program cannot be used, it is a simple task to create your own utility as the package file format is quite straight forward. To demonstrate this I have included a simple Python 3 script (Appendix – D) that performs the function for a single file. The script can be used as the basis of a more elaborate solution or as it stands, for example the following command will display the package file for MYFILE.COM, to the console.
$ python3 FilePackager.py MYFILE.COM
During the build of the machine I created a few package files, these are available below with the usual caveat that the binary files that these packages represent may be subject to copyright. If anyone owning that copyright of these programs is unhappy with them being published here, please let me know.
To give the machine a spin, I created a small CP/M utility (EXPORT.COM) with HiTech C, to write a package file to the console for any file on the CP/M system. This means that files can be recovered from the CP/M machine in the same package file format as used to deploy them. This allows a file to be exported from one machine and imported to another. EXPORT.COM was used to create a package file of itself so that I could include it in the list below.
EXPORT.COM is particularly useful for recovering binary files once they have been installed and configured e.g. WS.COM or VDE.COM. Updating the original package file with the configured version of the program makes things simple when reinstalling software at a later date.
The following Packages have been created, and can be downloaded from the link below.
- Aztec C
- BBC Basic (Generic CP/M)
- DBase II
- Hi-Tech C
- Kermit 411 (Generic CP/M)
- Sargon Chess I and II
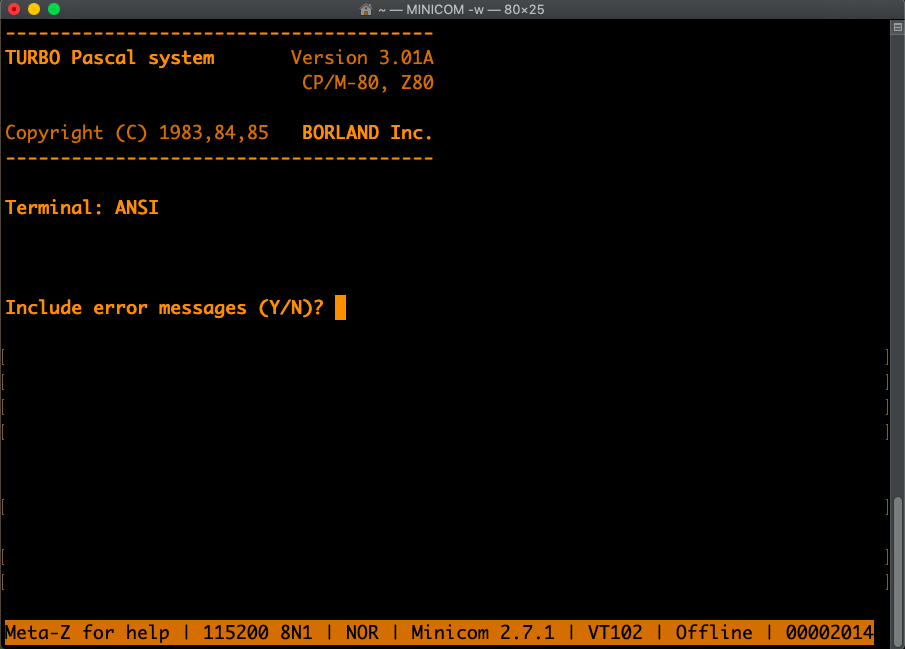
- Turbo Pascal 3
- VDE
- VEDIT
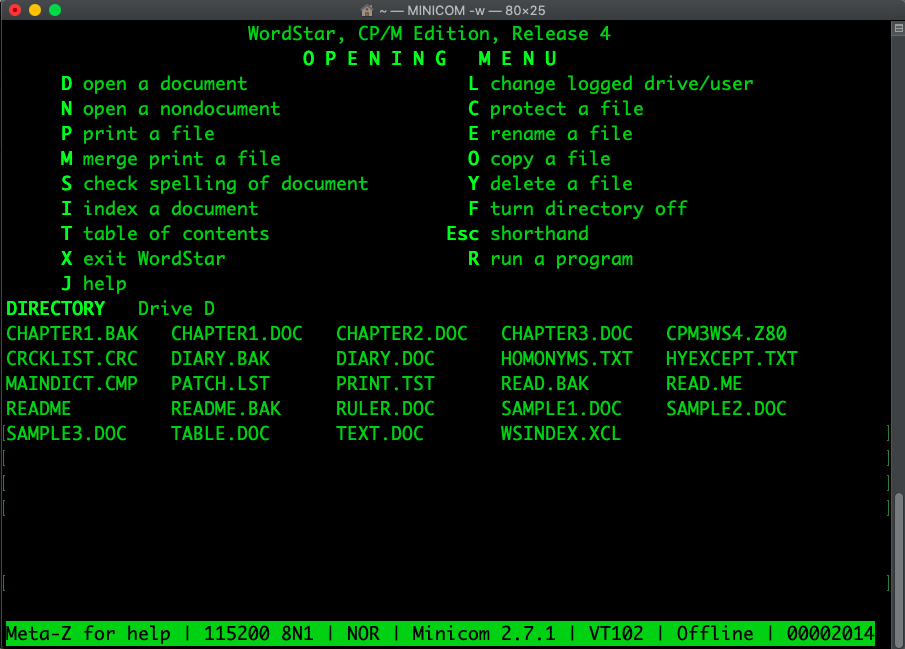
- WordStar 3
- WordStar 4 (including separate package for VT100 patched WS.COM. See Appendix B)
- EXPORT.COM (See Text)
Conclusion
The design and the board make it easy to build a working Z80 based CP/M machine. The difficulties I had with system hangs and resets were nothing at all to do with the design of the system or the board.
The revision of the board I used did not have any mounting holes, however, it wasn’t difficult to find a clear space to drill a few. I understand that Tom got so excited about the finished layout that he published it before remembering to add the holes.
I would recommend users consider using the can oscillator option as described above, this is a cheap, reliable device and means that the crystal and surrounding components can be left off the board if so desired. In addition, for those wanting to power the device via USB, I would recommend that that the supply from the cable is tested to ensure that the voltage remains consistent enough not to cause sporadic system resets.
This is a great product, and I have to thank and congratulate Grant and Tom on their respective designs, I now have a very nice portable CP/M machine to play with.
Appendix A – Testing with a 27128 EPROM
Tom’s PCB requires a 27256 EPROM rather than the 27128 as described in the Grant Searle breadboard design, however, if like me you already have a programmed 27128, this can be used to boot the machine to the monitor. To do this, remove U7 (74×259) and make a connection (using the empty socket) between pin 12 (ROM_PAGE14) to pin 16 (Vcc) and then from pin 4 (/ROMDISABLED) to pin 8 (Gnd).
Appendix B – Patching Wordstar
For Wordstar 3, please see Patching WordStar for use wth a VT-100 Terminal.
During the build I tried several non-windows terminal emulator products with the device (I don’t have a Windows machine). I found that whilst all of the terminal emulators worked well when in VT100 or ANSI mode, only Minicom offered the ‘transmit character delay’ setting needed to reliably paste the package files into the terminal window. Minicom works on Linux and MacOS, the two platforms of choice for me.
Each of the products tested correctly transmits the arrow key sequences defined in the VT100 documentation, however, my chosen editor, Wordstar 4, didn’t recognise these sequences as cursor control sequences. Thankfully, a simple patch to the user area using WSCHANGE.COM sorts the issue.
Please Note: For convenience, a patched version of WS.COM is included with the Packages.zip file described in the section Application Packages.
WSCHANGE presents the following options for changing settings, selecting E, followed by = allows the user area to be patched.
   Main Installation Menu

   A  Console........Monitor               Function Keys         Screen Patches
                     Keyboard Patches      Interface Patches

   B  Printer........Printer Choices       Printer Library       Printer Patches
                     Printing Defaults     Printer Interface

   C  Computer.......Disk Drives           Operating System      Patches
                     WordStar Files        Directory Display     Memory Usage

   D  WordStar.......Page Layout           Editing Settings      Help Level
                     Spelling Checks       Nondocument Mode      Indexing
                     Shorthand             Merge Print           Miscellaneous

   E  Patching.......General Patches       Reset All Settings    Auto Patcher

   X  Done with installation
   ?  Help

   Enter your menu selection... E
The following list describes the values to be entered to support the arrow keys when using a VT100 terminal emulator. Please note that the setting for the address 0x029B (FUNDLY::) was set to 5ms, this was chosen by trial and error and may be different on different systems. If the cursor keys do not get recognised, try increasing this value. Based on the information provided in the Wordstar supplied file PATCH.LST it may be that shorter delays can be used with lower clock speeds. For the system runnng at 7.3728 Mhz, 5ms worked well.
   029B            FUNDLY::
   029B 02             DB    05        ;Milliseconds of delay between characters
                                       ;of function key burst (if zero, no
                                       ;function keys are implemented).  See
                                       ;section on delays below before adjusting
                                       ;FUNDLY for your system.

   029C FF             DB    FF        ;Character that starts each burst
                                       ;(set to 0FFh to disable)

   029D            FUNTBL::
   029D 03             DB  03          ;Three chars in burst
   029E 1B 5B 41       DB  1B,5B,41    ;VT100 up arrow sequence
   02A1 01             DB  01          ;One char in replacement
   02A2 05             DB  05          ;CTRL E

   02A3 03             DB  03
   02A4 1B 5B 42       DB  1B,5B,42    ;VT100 down arrow sequence
   02A7 01             DB  01
   02A8 18             DB  18          ;CTRL X

   02A9 03             DB  03
   02AA 1B 5B 43       DB  1B,5B,43    ;Function key 3
   02AD 01             DB  01
   02AE 04             DB  04          ;CTRL D

   02AF 03             DB  03
   02B0 1B 5B 44       DB  1B,5B,44    ;Function key 4
   02B3 01             DB  01
   02B4 13             DB  13          ;CTRL S
If no other definitions are required, set the next byte to 0x00 e.g.
02B5 00
This is the normal end of the function key table and should be 0x00, if further definitions are required, place a continuation address at 02FB and format the continuation table in the same way as the above table.
   02FA 00             DB  0           ;End of table
   02FB 0000           DW  0           ;No continuation
Appendix C – Sending Files with Kermit
For this example I am using a single USB-RS232 adapter (/dev/tty.Repleo-PL2303-00002014) plugged into my MacBook Air connected to RS232 port 1 (CRT) on the Z80SBC device. The following command was used to start kermit on the Mac. Naturally, the command shown is specific to my serial device.
$ kermit -8 -C "SET LINE /dev/tty.Repleo-PL2303-00002014, SET CARRIER-WATCH OFF, SET SPEED 115200, SET FLOW XON/XOFF"
Connect to the remote system with the CONNECT command (C for short).
C-Kermit> CONNECT
Enter a CR to bring up the remote display. At this point a normal session to the device is in progress, applixations can be run such as WordStar etc. On an Mac or Linus machine, C-Kermit doesn’t emulate a terminal but handles the communications between the standard Linux or Mac shell and the device. Running KERM411 on the remote system ensures that Kermit is running at both ends.
A> KERM411
Once the CP/M version of Kermit is running files can be transferred.
A simple way to send files to the remote system is to configure the remote system as follows.
   Kermit-80 0A:> SET PORT CRT
   Kermit-80 0A:> RECEIVE
This should respond with the following
Kermit-80 0A:> Starting ... %0 0
Escape back to the local system (CTRL+\ and then C). And send a file e.g.
C-Kermit> SEND WS.COM
A result something like the following should be shown.
   C-Kermit 9.0.302 OPEN SOURCE:, 20 Aug 2011, MacBookAir-3.local [192.168.1.116]

      Current Directory: /Users/johnnewcombe
   Communication Device: /dev/tty.Repleo-PL2303-00002014
    Communication Speed: 115200
                 Parity: none
            RTT/Timeout: 08 / 05
                SENDING: WS.COM => WS.COM
              File Type: BINARY
              File Size: 280
           Percent Done: 36  //////////////////
                             ...10...20...30...40...50...60...70...80...90..100
    Estimated Time Left: 00:00:14
     Transfer Rate, CPS: 14
           Window Slots: 1 of 1
            Packet Type: %
           Packet Count: 1
          Packet Length: 80
            Error Count: 2
             Last Error: (resend)
           Last Message:

   X to cancel file, Z to cancel group, <CR> to resend last packet,
   E to send Error packet, ^C to quit immediately, ^L to refresh screen.
Once complete, the CONNECT command can be used to reconnect to the remote end e.g..
C-Kermit> CONNECT
Press CTRL-C to stop the auto-receive process and show the KERMIT prompt, exit kermit with the QUIT command to get back to CP/M.
Appendix D – Creating Package Files with Python
   import argparse
   import ntpath

   def open_if_exists(filename):
       try:
           fd = open(filename, "rb")

       except:
           return None
       else:
           return fd


   if __name__ == '__main__':

       parser = argparse.ArgumentParser()
       parser.add_argument("file", type=str, help="CP/M file to package.")
       opts = parser.parse_args()

       crc = 0
       length = 0
       filename = opts.file

       # open the file
       fd = open_if_exists(filename)

       if fd:
           # read all bytes
           bytes = fd.read()
           fd.close()

           # print package data
           print("A:DOWNLOAD {0}\r\nU0\r\n:".format(ntpath.basename(filename)), end=, flush=True)

           # display all bytes
           for b in bytes:
               print("{:02x}".format(b).upper(), end=, flush=True)
               length += 1
               crc += b

           # display checksum
           print(">{:02x}{:02x}".format(length & 0xFF, crc & 0xFF).upper())

       else:
           print("Could not open the file specified, does the file exist?")