A Raspberry Pi based Cluster for use with ipyparallel and MPI
The following article describes the configuration of Jupyter and ipyparallel for use with the Raspberry Pi cluster described in the article A Raspberry Pi based ‘Bramble’ Cluster for Docker Swarm.
The ipyparallel library provides an architecture for parallel and distributed computing. This architecture abstracts parallelism in a general way, enabling IPython to support many different styles of parallelism. Further details are available at https://ipyparallel.readthedocs.io/en/latest/intro.html#introduction. This article will describe how to use ipyparallel with both SSH and MPI based configurations.
The configuration described below combines ”ipyparallel” with the Jupyter Notebook. The Jupyter Notebook is an open-source web application that allows you to create and share documents that contain live code, equations, visualizations and narrative text, see http://jupyter.org/.
General

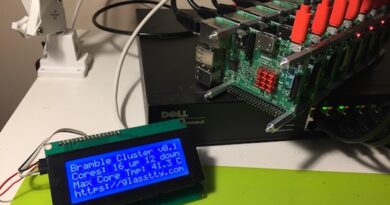
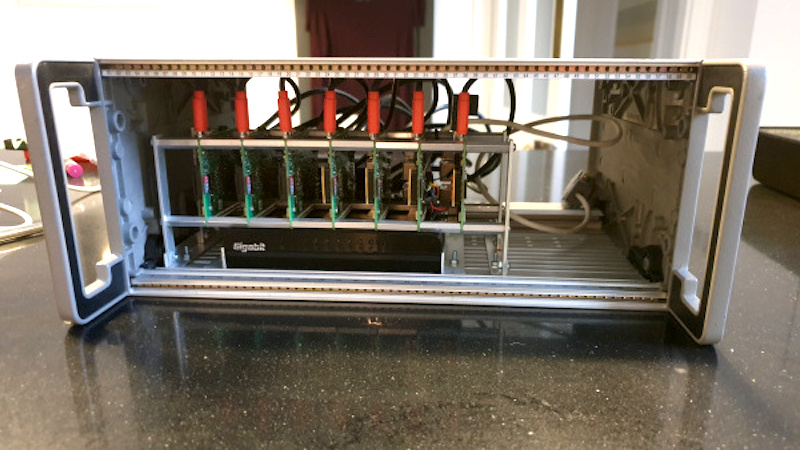
For the purposes of this article, the cluster described in the article A Raspberry Pi based ‘Bramble’ Cluster for Docker Swarm will be used. This cluster consists of seven, four core nodes all running Arch Linux. The IP addresses and their functions are described in the /etc/hosts file (see below) used on all nodes.
127.0.0.1     localhost.lan  localhost
192.168.1.80  node-00.lan    node-00    # Management Node
192.168.1.81  node-01.lan    node-01    # Worker Node
192.168.1.82  node-02.lan    node-02    # Worker Node
192.168.1.83  node-03.lan    node-03    # Worker Node
192.168.1.84  node-04.lan    node-04    # Worker Node
192.168.1.85  node-05.lan    node-05    # Worker Node
192.168.1.86  node-06.lan    node-06    # Worker Node
In addidtion to the software described in the afore mentioned article, additional software will need to be installed on each node (see below), ideally this would be completed before cloning the worker node SD card.
Ipyparallel provides its services through the use of a Controller and Engines. The controller provides an interface for working with a set of engines. In this example the ipyparallel Controller (and Hub) is hosted on the management node. The IPython engine is an extension of the IPython kernel for Jupyter. The engine listens for requests over the network, runs code, and returns results. In this article four engines are hosted on each of the worker nodes and one engine is hosted on the management node. A directory shared between the controller and all engines is provided by NFS.
Installing NFS
It is recommented that a ipyparallel profile folder is shared between all nodes of the cluster. A simple way to achieve this is to install an NFS server on the management node and NFS clients on the worker nodes.
Install nfs-utils on the server and all clients e.g.
# pacman -S nfs-utilsServer
Configure the server as follows.
Add the folders to be shared to /etc/exports. The following example shows a folder in home directory as user john.
# /etc/exports - exports(5) - directories exported to NFS clients
/home/john/nfs     192.168.1.80/24(rw,sync)
Make sure that id mapping is not disabled. The following command should return N
# cat /sys/module/nfsd/parameters/nfs4_disable_idmappingIf not, execute thhe following.
echo "N" | tee /sys/module/nfsd/parameters/nfs4_disable_idmappingMake this change permanent by adding the file /etc/modprobe.d/nfsd.conf with the contents as follows.
options nfsd nfs4_disable_idmapping=0Start the service and enable the service so that it starts when the system is rebooted.
# systemctl start nfs-server.service
# systemctl enable nfs-server.service
Client
Configure the clients by updating /etc/fstab. The example below shows the client example to match the server example shown above. Naturally it will be necessary to ensure that the ”/home/john/nfs” folder haS been created on the respective client node.
#
# /etc/fstab: static file system information
#
# <file system>           <dir>          <type>  <options> <dump> <pass>
/dev/mmcblk0p1         /boot          vfat    defaults  0      0
node-00:/home/john/nfs /home/john/nfs nfs     defaults  0      0
Execute the following command to re-read /etc/fstab.
# mount -aJupyter and ipyparallel Installation
Management Node
Jupyter can be installed with the jupyter-notebook package e.g.
# pacman -S jupyter-notebookAfter installation, run the following to enable interactive Javascript widgets in the notebooks; otherwise, widgets will be disabled.
# jupyter nbextension enable --py --sys-prefix widgetsnbextensionIn order to access the Jupyter notebooks from another machine on the network, a couple of changes need to be made to the config file located at ~/.jupyter/jupyter_notebook_config.py as follows.
c.NotebookApp.open_browser = False
c.NotebookApp.ip = "*"
Please note that these settings compromise security and should not be used in environments where that would be an issue. For details of adding security, please see https://jupyter.readthedocs.io/.
The ipython-ipyparallel package can be installed from AUR using YAY (see below).
To install YAY on Arch Linux, the following procedure can be used
Clone the yay git repository
cd /opt
sudo git clone https://aur.archlinux.org/yay-git.git
Change the file permissions from the root the sudo user.
sudo chown -R john:john ./yay-gitBuild the package from PKGBUILD
cd yay-git
makepkg -si
Upgrade
yay -SyuInstall ipython-ipyparallel
$ yay -S ipython-ipyparallelMove the contents of the ”.ipython” folder to ~/nfs/ipython, remove the ”.ipython” directory and create a link to the this location. This is a simple way of keeping the default profile directories whilst at the same time using the shared NFS directory e.g.
ln -s /home/john/nfs/ipython /home/john/.ipythonAdd the ~/nfs/ipython/code directory, This will be needed when running the Jupyter Notebook as a service (see below) service.
Worker Nodes
Install the following packages on each of the worker nodes
# pacman -S jupyter-notebookTo install the ipyparallel package use…
$ yay -S ipython-ipyparallelRemove the .ipython directory and create a link to the ~/nfs/ipython folder. This is a simple way of keeping the default profile directories whilst at the same time using the shared NFS directory e.g.
$ ln -s /home/john/nfs/ipython /home/john/.ipythonRunning Jupyter Notebook as a Service
Jupyter notebook can be run on system start as a service, but should be run as a normal user. All that is required is to create a systemd service file e.g. jupyter.service and place it in the /usr/lib/systemd/system/ directory.
[Service]
Type=simple
PIDFile=/run/jupyter.pid
ExecStart=/usr/bin/jupyter-notebook --config=/home/john/.jupyter/jupyter_notebook_config.py
User=john
Group=john
WorkingDirectory=/home/john/nfs/ipython/code/
Restart=always
RestartSec=10
#KillMode=mixed

[Install]
WantedBy=multi-user.target
The service can be started and enabled (to start on a boot) with the following commands.
# systemctl start jupyter.service
# systemctl enable jupyter.service
Configuring ipyparallel
This article describes two approaches for launching ipyparallel controllers and engines across the cluster. The firat uses SSH as the configuration is simpler and should work first time in the majority of cases. The second approach uses MPI. In addition to starting engines using MPI, support for MPI applicationsis also provided.
The sections below refer to the /home/john/.ipython folder, however, it is assumed that this folder is actually a link to the nfs folder at ”/home/john/nfs/ipython” as described above.
SSH
For this example it is the intention to start the controller and the engines using the ipcluster command line utility in conjuntion with SSH. As we are to be running the engines on multiple machines, this example will use the ”SSHEngineSetLauncher” to start these engines. For this, a specific profile will be configured.
To create a new profile called ssh the following command can be used. This will create a new folder in ~/.ipython/profile_ssh containing configuration files.
ipython profile create --parallel --profile=sshTo use this mode, select the SSH launchers in ~/.ipython/profile_ssh/ipcluster_config.py (remembering that this is a folder that is shared across all nodes, see NFS above) e.g.
c.IPClusterEngines.engine_launcher_class = 'SSHEngineSetLauncher'Engines are specified in a dictionary, by hostname and the number of engines to be run on that host. The following dictionary entry defines the hostnames of the cluster, node-00 is the management node with a single engine and the controller, the remainder are worker nodes each with 4 engines.
c.SSHEngineSetLauncher.engines = { 'node-00' : 1,
                                   'node-01' : 4,
                                   'node-02' : 4,
                                   'node-03' : 4,
                                   'node-04' : 4,
                                   'node-05' : 4,
                                   'node-06' : 4 }

c.SSHEngineSetLauncher.engine_args = ['--profile-dir=/home/john/.ipython/profile_ssh']
The controller configuration is completed by simply adding the following line to your ./ipython/profile_ssh/ipcontroller_config.py, setting the ipaddress to that of the controller.
c.HubFactory.client_ip = '192.168.1.80'The engine configuration requires that the following lines are added to the ./ipython/profile_ssh/ipengine_config.py file. In the case of the c.EngineFactory.location setting, the ipaddress should be set to that of the controller.
c.EngineFactory.location = '192.168.1.80'
c.RegistrationFactory.ip = '*'
From the management node the cluster can be started with the following command.
ipcluster start --profile=sshMPI
For this example it is the intention to start the controller and the engines using the ipcluster command line utility in conjuntion with MPI. As we are to be running the engines on multiple machines, this example will use the MPIEngineSetLauncher to start these engines.
At this point it is worth installing the openmpi and mpi4py packages e.g.
# pacman -S openmpi
# pacman -S python-mpi4py
Create a new ipyparallel profile called mpi by executing the following command. This will create a new folder in ~/.ipython/profile_mpi containing configuration files.
$ ipython profile create --parallel --profile=mpiTo use this mode, select the MPI launchers in ~/.ipython/profile_mpi/ipcluster_config.py and specify a hostfile in the c.MPILauncher.mpi_args e.g.
c.IPClusterEngines.engine_launcher_class = 'MPIEngineSetLauncher'
c.MPILauncher.mpi_args = ["-hostfile", "/home/john/.ipython/profile_default/mpihostfile"]
Create a hostfile /home/john/.ipython/profile_default/mpihostfile in this example as follows.
node-01 slots=4
node-02 slots=4
node-03 slots=4
node-04 slots=4
node-05 slots=4
node-06 slots=4
The slots parameter refers to the number of processors available on each host, not the number of engines to start.
Add the settings to the ipcontroller_config.py’configuration file as follows.
c.HubFactory.client_ip = "192.168.1.80"
c.HubFactory.engine_ip = "192.168.1.80"
c.HubFactory.monitor_ip = "192.168.1.80"
Add the settings to the ipengine_config.py configuration file as follows.
c.RegistrationFactory.ip = '*'
c.EngineFactoryLocation = '192.168.1.80'
c.EngineFactory.use_mpi = True
c.MPI.use = 'mpi4py'
From the management node the cluster can be started with the following command.
ipcluster start --profile=mpi -n 24Testing the System
This should copy all of the .json files in ./ipython/profile_ssh/security to the remote nodes and start the engines.
The following Jupyter notebook can be used to test the system (for brevity the output below shown a system with 4 nodes). The examples below is using the mpi profile, to test the ssh profile simply change the value in the ipp.Client constructor.
In: [1] import ipyparallel as ipp
In: [2] c = ipp.Client(profile='mpi')
In: [3] c.ids
Out:[3] [0, 1, 2, 3, 4]
In: [4]: c[:].apply_sync(lambda : "Hello, World")
Out:[4] ['Hello, World',
         'Hello, World',
         'Hello, World',
         'Hello, World']
Alternatively this could be executed as a python script e.g. iptest.py from the management node.
import ipyparallel as ipp
c = ipp.Client(profile='mpi')
print(c.ids)
print(c[:].apply_sync(lambda : "Hello, World"))
Scientific and Data Processing Packages
The interactive behaviour of Jupyter Notebook and the underlying IPython library, lends itself to scientific and data processing tasks. The following packages provide some of the tools associated with such activities.
The ”Base” packages are considered to be the essential packages for a basic scientific/data analysis type system. The packages listed in the optional section are worth installing for a more complete set of tools.
Base Packages
- python-numpy: Scientific tools for Python
- python-scipy: Mathematics, science, and engineering tools.
- python-matplotlib: Plotting library, making publication quality plots
- python-pandas: Cross-section and time series data analysis toolkit
These can be installed using the following command.
sudo pacman -S python-numpy python-scipy python-matplotlib python-pandasOptional Packages
- python-pandas-datareader: pandas.io.data replacement (recommended)
- python-numexpr: needed for accelerating certain numerical operations (recommended)
- python-bottleneck: needed for accelerating certain types of nan evaluations (recommended)
- python-pytables: needed for HDF5-based storage
- python-sqlalchemy: needed for SQL database support
- python-openpyxl: needed for Excel XLSX input/output
- python-xlrd: needed for Excel XLS input
- python-xlwt: needed for Excel XLS output
- python-xlsxwriter: alternative Excel XLSX output
- python-blosc: for msgpack compression using blosc
- python-pyqt5: needed for read_clipboard function (only one needed)
- pyside2: needed for read_clipboard function (only one needed)
- python-beautifulsoup4: needed for read_html function
- python-lxml: needed for read_html function (and/or python-html5lib)
- python-html5lib: needed for read_hmlt function (and/or python-lxml)
These can be installed with the following command e.g.
# pacman -S python-pandas-datareader python-numexpr python-bottleneck python-pytables python-sqlalchemy python-openpyxl python-xlrd python-xlwt python-xlsxwriter python-blosc python-pyqt5 pyside2 python-beautifulsoup4 python-lxml python-html5lib