Installing Arch Linux on a Raspberry Pi 3
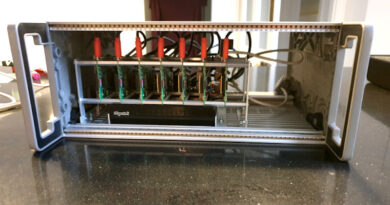
This article describes a simple approach to build a basic Arch installation with fixed IP address and a few basic utilities. Typically, once complete, I would create a clone of this SD card (see Cloning an SD Card for Raspberry Pi below) in order to replicate the installation quickly for other machines etc. This is particularly useful when adding nodes to a cluster (bramble).
Basic Installation
Insert the SD card to be used into a Linux machine and determine the device using e.g.
lsblk
Fo MacOS the following command can be used
diskutil list
The device /dev/sdX should be replaced with the correct device as displayed using the above command.
Start fdisk to partition the SD card:
fdisk /dev/sdX
At the fdisk prompt, delete old partitions and create a new one:
- Type o. This will clear out any partitions on the drive.
- Type p to list partitions. There should be no partitions left.
- Type n, then p for primary, 1 for the first partition on the drive, press ENTER to accept the default first sector, then type +100M for the last sector.
- Type t, then c to set the first partition to type W95 FAT32 (LBA).
- Type n, then p for primary, 2 for the second partition on the drive, and then press ENTER twice to accept the default first and last sector.
- Write the partition table and exit by typing w.
- Create and mount the FAT filesystem:
   mkfs.vfat /dev/sdX1
   mkdir boot
   mount /dev/sdX1 boot
Create and mount the ext4 filesystem:
   mkfs.ext4 /dev/sdX2
   mkdir root
   mount /dev/sdX2 root
Download and extract the root filesystem (as root, not via sudo):
   wget http://os.archlinuxarm.org/os/ArchLinuxARM-rpi-2-latest.tar.gz
   bsdtar -xpf ArchLinuxARM-rpi-2-latest.tar.gz -C root
   sync
Move boot files to the first partition:
mv root/boot/* boot
Unmount the two partitions:
umount boot root
Insert the SD card into the Raspberry Pi, connect ethernet, and apply 5V power. Use the serial console or SSH to the IP address given to the board by your router. Login as the default user alarm with the password alarm, the default root password is root.
Full details of the installation are detailed here:
https://archlinuxarm.org/platforms/armv8/broadcom/raspberry-pi-3
Update the System
Initialise and populate the keyring
   pacman-key --init
   pacman-key --populate
Update the system
pacman -Suy
Add a User
Create a new user
$ useradd -m -G wheel -s /bin/bash john
If not asked to enter a password log in as root (or su) and set the password
$ passwd john
Once the new user has been tested, any predefined default user can be deleted e.g.
userdel -r <user>
SSH
SSH should be enabled by default. The following command will confirm this.
# systemctl status sshd.service
If the service needs to be enabled or started, the following commands can be used as required.
   # systemctl enable sshd.service
   # systemctl start sshd.service
If you do not already have a public/private key pair, details of how to do this can be fount at https://wiki.archlinux.org/index.php/SSH_keys#Generating_an_SSH_key_pair.
Copy the public key to /home/<user>/.ssh. This can be sone using SSH from another device e.g. to copy a public key to /home/john on a pi with the IP 192.168.1.66, from a Linux/Mac on the same network the following command can be used.
cat ~/.ssh/id_rsa.pub | ssh john@192.168.1.66 "mkdir -p ~/.ssh && cat >> ~/.ssh/authorized_keys"
The matching private key should be placed in .ssh directory of the connecting device. Once the keys have been installed, it should be possible connect with SSH using the key rather than a password. All that is required is to change the entries in /etc/ssh/sshd_config to tighten things up a little.
   PermitRootLogin no
   PubkeyAuthentication yes
   PasswordAuthentication no
Reboot the machine and test SSH.
reboot
Once SSH is up and running, scp can be used to copy any required files to the new machine using a command similar to the following;
scp myfile john@192.168.1.66:~/somefolder/myfile
Sudo
Follow the instructions here to install a SUDO user.
Networking
Set the Hostname
Set the hostname
$ nano /etc/hostname
Fixed IP Address
There are several ways to do this, the method I use most frequently is Systemd. To specify a fixed IP, include an eth0.network file in /etc/systemd/network something like the following and reboot (assumes interface is eth0).
   [Match]
   Name=eth0

   [Network]
   DHCP=no
   Address=192.168.1.67/24
   Gateway=192.168.1.254
   DNS=192.168.1.254
Start and enable the service.
   # systemctl start systemd-networkd.service
   # systemctl enable systemd-networkd.service
Ensure that /etc/resolv.conf exists and includes the appropriate nameserver entry.
Nameserver 192.168.1.254
If WiFi is required add s the following profile file wlan0.network to /etc/systemd/network (Ensure the IP is set appropriately)
   [Match]
   Name=wlan0

   [Network]
   DHCP=no
   Address=192.168.1.76/24
   Gateway=192.168.1.254
   DNS=192.168.1.254
Install wpa_supplicant e.g.
pacman -S wpa_supplicant
Add the following to wpa_supplicant-wlan0.conf
   ctrl_interface=DIR=/var/run/wpa_supplicant GROUP=netdev
   update_config=1

   network={
       ssid="<SSID>"
       psk="<password>"
   }
Start wpa_supplicant e.g.
   systemctl enable wpa_supplicant@wlan0.service
   systemctl start wpa_supplicant@wlan0.service
Base Packages
$ pacman -S base-devel file git wget
Cloning an SD Card for Raspberry Pi
This article describes the steps necessary to clone an SD card using MacOS or Linux for use in a Raspberry Ri. Be aware that restoring the disc image to the SD Card can take some time, anything up to an hour or so.
MacOS
Identify the disk
diskutil list
Copy the disk image to the Mac.
sudo dd if=/dev/diskX of=~/Desktop/raspberrypi.dmg
Insert new SD card and identify the disk (as above) and unmount the disk.
diskutil unmountDisk /dev/diskX
Format and copy the disk
   sudo newfs_msdos -F 16 /dev/disk2
   sudo dd if=~/Desktop/raspberrypi.dmg of=/dev/diskX
Linux
Identify the disk
lsblk
Copy the disk image to the machine, where the disk is /dev/sdk
dd if=/dev/sdX of=~/raspberrypi.img
Insert new SD card and identify the disk (as above) and un-mount the disk.
umount /dev/sdX1
Copy the disk
dd if=~/raspberrypi.img of=/dev/sdX