Building a Standalone Softmodem Enabled PABX
Inspired by the article Build your own PABX and Modem Emulator by HereBeDragons, http://heredragons.be/pabx/. I thought I would spend a little time creating my own version for use with viewdata systems such as TELSTAR.
The aim of this project is to create an Asterisk PABX on a Raspberry Pi with two local extensions numbered 100 and 101 and two external connections to the Telstar Viewdata system accessed by dialling 618 and 918 respectively. The idea is that I can connect an 1980s computer with modem to one of the extensions and dial 618 or 918 and have my call routed to the Telstar viewdata system.
The Raspberry Pi will be configured with two network interfaces by making use of both the Wifi and wired connections. The Wifi network interface will connect to a local WiFi network and therefore the internet in the usual way and the wired network port of the Raspberry Pi will be used as a second network for Asterisk and the analogue telephone connections.
To reproduce this system you will need;
- Raspberry Pi 3/4/400;
- An two port analogue telephone adapter e.g. Grandstream HT802.
- A couple of telephones/modems etc. to test it with;
- A reasonable amount of patience.
The steps to be taken are shown below and in this example I used a Raspberry Pi 400 configured to boot to the 64bit full desktop version of Pi OS (Debian Bullseye).
- Install some essentials;
- Download Asterisk 18;
- Build Asterisk and install;
- Configure Asterisk;
- Configure the network;
- Install and configure dnsmasq;
- Configure the Analogue Telephone adapters.
Install some Essentials
# apt update
# apt -y install git curl wget libnewt-dev libssl-dev libncurses5-dev subversion libsqlite3-dev build-essential libjansson-dev libxml2-dev  uuid-dev g++
Download Asterisk
Download the Asterisk source, in this example I am using Asterisk 18. Because we are needing to add the soft modem app, we need to download the source, add the soft modem code and build Asterisk ourselves.
Download the Source
# cd ~
# wget http://downloads.asterisk.org/pub/telephony/asterisk/asterisk-18-current.tar.gz
# tar xvf asterisk-18-current.tar.gzx
Download the MP3 Decoder Library.
# cd asterisk-18*/
# contrib/scripts/get_mp3_source.sh
Resolve any dependencies.
# sudo contrib/scripts/install_prereq installDownload the Softmodem code and copy it to the Asterisk.
# cd ~
# wget https://raw.githubusercontent.com/johnnewcombe/asterisk-Softmodem/app_softmodem/app_softmodem.c
Build Asterisk and Install
# cd asterisk-18*/
# ./configure
# make menuselect
If this all works you will be presented with a menu. If you do not know what to do with this, simply Save and Exit.
# make
# make install
# make progdocs
Make the config.
# make sampless
# make config
# ldconfig
Create an Asterisk user and configure.
# groupadd asterisk
# useradd -r -d /var/lib/asterisk -g asterisk asterisk
# usermod -aG audio,dialout asterisk
# chown -R asterisk:asterisk /etc/asterisk
# chown -R asterisk:asterisk /var/{lib,log,spool}/asterisk
# chown -R asterisk:asterisk /usr/lib/asterisk
Update the Asterisk configuration files.
# vim /etc/default/asterisk

  AST_USER="asterisk"
  AST_GROUP="asterisk"
# vim /etc/asterisk/asterisk.conf
runuser = asterisk ; The user to run as.
rungroup = asterisk ; The group to run as.Start Asterisk
# systemctl start asterisk
# systemctl status asterisk
Journal entries can be viewed with the following command (x = extra detail, e = jump to the end, u = the unit to view).
# journalctl -xeu asteriskOnce you are happy things are OK then enable Asterisk so that it starts at boot time..
# systemctl enable asteriskConnect to the Asterisk CLI, (the more ‘v’s the more verbose).
# asterisk -rvvvvv

CLI> pjsip show endpoints
No objects found.
Configure Asterisk
In this example a Grandstream HT802 analogue telephone adapter (ATA) is being used. This ATA provides two analogue telephone connections and has a single ethernet connection. This allows two extentions to be added to the single wired network port of the Raspberry Pi. To tell Asterisk that there are two telephone connections, the /etc/asterisk/pjsip.conf config file needs to be changed.
The first thing top do is make sure that a Transport is defined. Note that I am binding Asterisk to the IP address 192.168.0.10. This will be the IP address of the wired ethernet port of the Raspbery Pi.
/etc/asterisk/pjsip.conf

[transport-udp]
type=transport
protocol=udp    ;udp,tcp,tls,ws,wss,flow
bind=192.168.0.10 ; address of network interface that is accessible for phones.
Once that is done add two endpoints, note that mine are called 802a1fx1 and 802a1fx2, these are just arbitrary names that mean something to me. They are used to tie the sections together. At this point no extension numbers are defined.
/etc/asterisk/pjsip.conf

[802a1fx1]
type=endpoint
transport=transport-udp
context=from-internal
disallow=all
allow=ulaw
allow=gsm
auth=802a1fx1
aors=802a1fx1

[802a1fx1]
type=auth
auth_type=userpass
password=802a1fx1
username=802a1fx1

[802a1fx1]
type=aor
max_contacts=1
/etc/asterisk/pjsip.conf
[802a1fx2]
type=endpoint
transport=transport-udp
context=from-internal
disallow=all
allow=ulaw
allow=gsm
auth=802a1fx2
aors=802a1fx2
[802a1fx2]
type=auth
auth_type=userpass
password=802a1fx2
username=802a1fx2
[802a1fx2]
type=aor
max_contacts=1The configuration can be checked with the following commands.
pjsip show transports
pjsip show endpoints
pjsip show aors
pjsip show auths
Once the endpoints are defined, we can create the dial plan. This is done in /etc/asterisk/extensions.conf. Note that we have created the [from-internal] contect section and that this maps to the context specified in the endpoints in /etc/pjsip.conf. The config below defines two extensions, 100 and 101. In addition a dial plan for numbers 618 and 918 are configured to answer with the soft modem that was added during the build before connecting to the Telstar Videotex service. The softmodem is configured for V23, 7 data bits, 1 stop bit with even parity.
[from-internal]

exten => 100,1,Dial(PJSIP/802a1fx1)
exten => 101,1,Dial(PJSIP/802a1fx2)

exten => 618,1,Set(VOLUME(TX)=2)
exten => 618,n,Set(VOLUME(RX)=2)
exten => 618,n,Answer()
exten => 618,n,Softmodem(glasstty.com, 6502, v(V23)ld(7)s(1)e)
exten => 618,n,Hangup()

exten => 918,1,Set(VOLUME(TX)=2)
exten => 918,n,Set(VOLUME(RX)=2)
exten => 918,n,Answer()
exten => 918,n,Softmodem(glasstty.com, 6510, v(V23)ld(7)s(1)e)
exten => 918,n,Hangup()
The transport for Asterisk was setio bind only to the IP Address 192.168.0.10 which is to be the IP address of the wired ethernet connection on the Raspberry Pi. Therefore, for completeness we should also set this in /etc/asterisk/iax.conf.
/etc/asterisk/iax.conf

[general]
bindport=4569 ; the default port to listen on
bindaddr=192.168.0.10 ; the address of eth0 on the Raspberry Pi
Configure the Network
This simply means set the wired ethernet interface to a static IP Address. The address chosen should match the IP address used in the transport section of /etc/asterisk/pjsip.conf and the general section of the /etc/asterisk/iax.conf. In thie example here 192.168.0.10 was used.
A simple way to set the IP address of the wired ethernet connection is to modify the /etc/dhcpcd.conf file and add the following.
/etc/dhcpcd.conf
interface eth0
static ip_address=192.168.0.10/24
Install and Configure DNSMASQ
The application dnsmasq is a lightweight DNS and DHCP Server. This will be configured to listen on the wired ethernet port only and will allow the Grandstream HT802 analogue telephone adapter to obtain an IP address etc. This can be installed with the following command.
# apt update
# apt upgrade
# apt install dnsmasq
Once installed configure dnsmasq as follows.
/etc/dnsmasq.conf

# Never forward plain names (without a dot or domain part) domain-needed
domain-needed

# Never forward addresses in the non-routed address spaces.
bogus-priv

# Specify the interface to use and deny all others
interface=eth0
except-interface=wlan0

# Specify a range of addresses for the telephone adapters
dhcp-range=192.168.0.50,192.168.0.150,12h
Once configured, it can be started with the following command.
# systemctl start dnsmasqDnsmasq can be configured to start when the system boots with the following command.
# systemctl enable dnsmasqConfigure the Analogue Telephone adapters.
In this example I used the Grandstream HT802 analogue telephone adapters (ATAs). These units support two analogue telephones (pulse and DTMF) and have a single ethernet connection. This unit was connected to the wired ethernet connection of the Raspberry Pi. And each telephone port, FXS Port 1 and FXS Port 2, were configured as shown below, hopefully, this will be enough information to configure other types of ATAs
- The IP address is set for DHCP, this will be provided by dnsmasq
- The primary SIP server for each port was set to 192.168.0.10
- The SIP User ID was set to 802a1fx1 and 802a1fx2, the passwords were set to the same as the user ID in each case. Note that these values are set in the authentication section for each endpoint in /etc/asterisk/pjsip.conf.
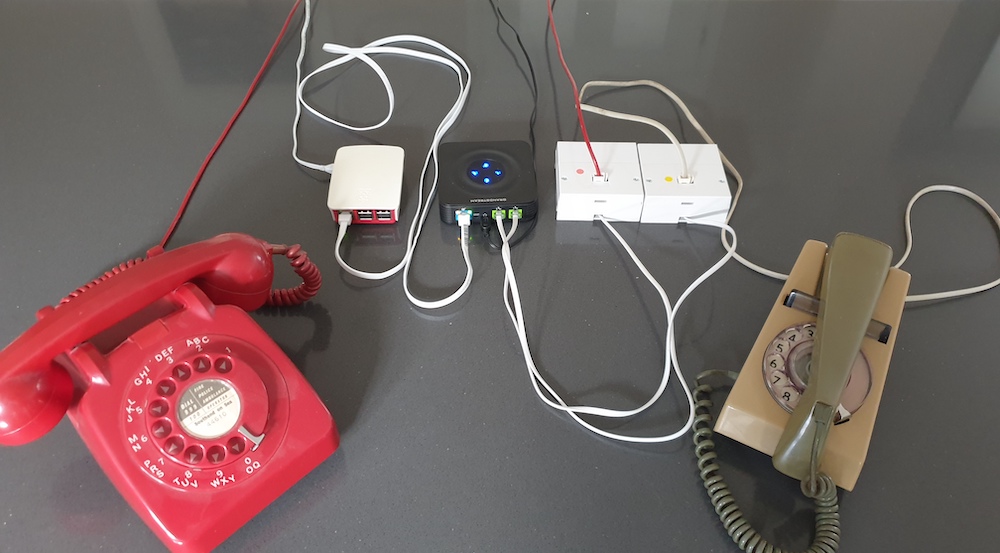
In this example the analogue telephones are connected to the ATAs via a standard ‘Master’ socket, this ensures that each phone rings properly. There are more elegant solutions such as an all in one BT socket to RJ11adaptor that includes a ring capacitor.
Testing it Out
Dialling 101 from the telephone pluged into the first FXS port should cause the second telephone to ring and similarly calling 100 from the telephone plugged into the second FXS port will call the first telephone. Calling 618 or 918 from any telephone should get answered by a V23 1200/75 modem tone, calling 918 from a Prestel or Minitel terminal should connect to Telstar.
Related Articles
Much of this work was based on a previous article installing-and-configuring-asterisk-18-with-softmodem-on-ubuntu-20.