Using MAME to Emulate the Apple II+
Introduction
The article 6502 Cross Assembly for the Apple II using MacOS, describes, as the titles suggests, how to use a modern text editor, cross compiler and Apple II emulator for developing software for the Apple II using MacOS. In the article, the emulator described was the Virtual ][ emulator (http://www.virtualii.com/).
Whilst I can heartily recommend this emulator, for me at least, the inability to accurately emulate the Videx Videoterm 80 column display has been a serious problem. To get a true emulation of the Videx card, it seems the only emulator to use on MacOS is the cross platform MAME software.
MAME is quite remarkable in the number of systems it can emulate, as a result some of the concepts can take a little time to get used to, and configurations can take some time to perfect. However, for the purposes of this article and to keep things simple, I will only be looking at emulating an Apple II+.
Installation
Install SDL 2
This is a multimedia library that lets MAME display graphics, sounds and read keyboards and game controllers. SDL 2 can be installed with the brew package manager (https://brew.sh/).
$ brew install sdl2
Install SDL MAME
SDL Mame can be installed using the brew package manager (https://brew.sh/) e.g.
$ brew install mame
ROMS
Before running the mame binary, it is necessary to obtain the Apple II+ romset. This is a specific MAME romset, and for the Apple II+ it is called apple2p the Apple //e romset is called apple2e. There are others for the GS, IIc and so on. These will need to be obtained before going further. A good place to start looking is https://www.emuparadise.me.
The romset will be a zip archive file, copy this file as it is (i.e. zipped) into a directory called roms in the directory that you will be running mame from. For example create the directory ~/mame. Within that directory create the roms directory containing the zipped rom files. From the ~/mame directory execute mame (see Emulating the Apple II+ below).
Alternatively the path to the ‘roms’ directory can be specified using the -rompath parameter (see https://docs.mamedev.org/commandline/commandline-all.html#mame-commandline-rompath)
The romset includes several peripheral card emulations including the Videx Videoterm. To see a full list, execute the following command.
mame -listslots apple2
To see the default slot configurations execute the following command
mame -listdevices apple2p
Emulating the Apple II+
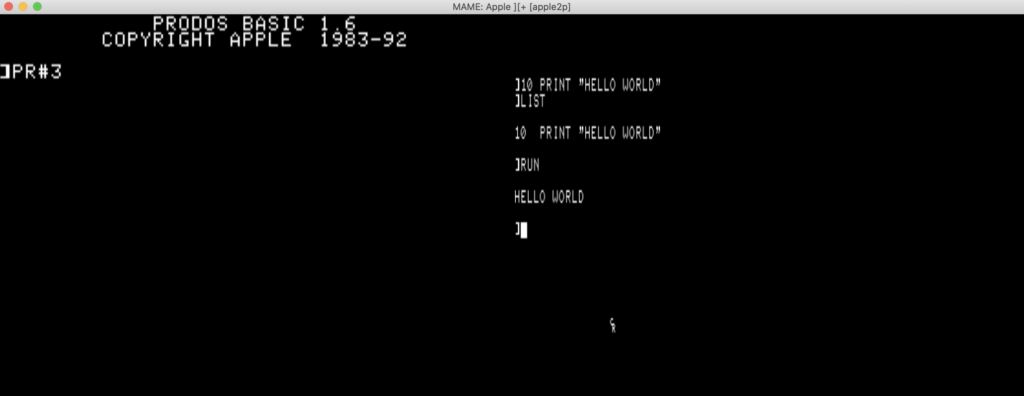
The default settings for the Apple II+ emulation include an Apple II 16K Language Card in Slot 0, a Sweet Micro Systems Mockingboard in slot 4 and an Apple Disk II NG controller in slot 6. To create a default Apple II+ with the above configuration, with the disk TestDisk.po in floppy 1, the following command can be used. Notice that in this case the emulation is being instructed to run at 3 times normal speed (-speed 3) and that the disk image is located in the parent directory.
mame apple2p -noreadconfig -skip_gameinfo -speed 3 -window -nomax -flop1 ../TestDisk.po
The MAME documentation (http://docs.mamedev.org) will explain the remaining switches.
Example: Adding a Videx Videoterm Card
The following command adds the Videx Videterm Card to slot 3 and the TestDisk.po disk image in floppy drive 1.
mame apple2p -noreadconfig -skip_gameinfo -speed 3 -window -nomax -sl3 videoterm -flop1 TestDisk.po
Example: Replacing the Mockingboard with a Z80 Card
The following command replaces the default Mockingboard in slot 4 with a MS Z80 Softcard and the TestDisk.po disk image in floppy drive 1.
mame apple2p -noreadconfig -skip_gameinfo -speed 3 -window -nomax -sl3 videoterm -sl4 softcard -flop1 TestDisk.po
Alternatively a PCPI Z80 Applicard
mame apple2p -noreadconfig -skip_gameinfo -speed 3 -window -nomax -sl3 videoterm -sl4 applicard -flop1 TestDisk.po
Using the Super Serial Card
The Apple II Super Serial Card (SSC) can be emulated, however, typically the I/O of the card is mapped to a stream such as a file or a socket. There is also a loopback option.
The following example configures the SSC for slot 2, configured as a Null Modem, sending all output to the file output.txt.
mame apple2p -noreadconfig -skip_gameinfo -verbose -uimodekey CAPSLOCK -speed 10 -window -nomax -sl2 ssc -sl2:ssc:ssc_rs232 null_modem -bitbanger output.txt -sl3 videoterm -sl4 applicard -flop1 TestDisk.po
An altogether more interesting configuration is to bind the bi-directional SSC to a socket and then connect to that socket using a network terminal.
For example the following command connects the SSC to local host port 2023.
mame apple2p -noreadconfig -skip_gameinfo -verbose -speed 10 -window -nomax -sl2 ssc -sl2:ssc:ssc_rs232 null_modem -bitbanger socket.127.0.0.1:2023 -sl3 videoterm -sl4 applicard -flop1 TestDisk.po
Once this has been run, you can attach a terminal to this port.
telnet 127.0.0.1 2023
Taking things further, it is possible to use socat to connect that SSC port to a local bash shell. This is very useful when using terminal emulation software on the Aplle II, or in my case when developing terminal emulation software. Socat is available for all the important platforms via you chosen distribution’s repository or via Homebrew for MacOS.
To create an Apple II+ emulation with the SSC connected to the local machines bash shell the socat command can be run first followed by the above mame command e.g.
socat tcp-l:2023,reuseaddr,fork exec:/bin/bash,pty,setsid,setpgid,stderr,ctty
mame apple2p -noreadconfig -skip_gameinfo -verbose -speed 10 -window -nomax -sl2 ssc -sl2:ssc:ssc_rs232 null_modem -bitbanger socket.127.0.0.1:2023 -sl3 videoterm -sl4 applicard -flop1 ../TestDisk.po
If this doesn’t work for you, check permissions by running mame64 using sudo. Also ensure that the bitbanger is set to the same speed as the SSC. You may need to go into the Tab menu to do this (i.e. press SCROLL LOCK then TAB). The default is 9600 8/N/1, so start with the SSC at this setting and you will be able to work things out.
Note that the SSC DIP switches (including interrupts) can be set from the DIP Switches menu.
Changing the UI Mode Key
To see the UI, the SCROLL-LOCK key is normally used. This key may not exist on some laptops in which case an alternative key can be configured using the -uikeymode switch e.g.
mame apple2p -noreadconfig -skip_gameinfo -verbose -speed 10 -uimodekey CAPSLOCK -window -nomax -sl2 ssc -sl2:ssc:ssc_rs232 null_modem -bitbanger socket.127.0.0.1:2023 -sl3 videoterm -sl4 applicard -flop1 ../TestDisk.po
Integrating MAME with the VSCode/Atom
Referring to the article 6502 Cross Assembly for the Apple II using MacOS, all that is required to use MAME instead of Virtual ][ is to modify the build-test script. For example the existing line…
osascript "Virtual][Emulation.scpt"
…becomes.
mame apple2p -noreadconfig -skip_gameinfo -verbose -uimodekey CAPSLOCK -speed 3 -window -nomax -sl3 videoterm -flop1 $1.po
Enjoy!